Stitched Paper Cards & Gifts
- Created by: By Jenny I and the Logan Central Library Staff
- Age Range: All Ages
- Difficulty Level: Easy
- Time Taken: 1 hour
- Approximate Cost: Free
It is a fabulous feeling to upcycle old clothes and packaging from around your home. It is even better to make these upcycled objects into cards and gifts for your loved ones - gifts that do not cost the Earth.
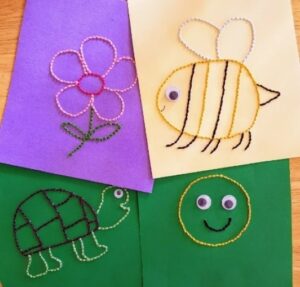
Here are some projects that are created with an easy running stitch. Recycled paper, threads or fabric are used as a base for these designs. Once you get started you can create your own unique designs just by drawing or tracing simple shapes, text and pictures.
If you have not tried sewing before, practising your new skill on cardboard is a great place to start. Mishaps don't matter so much when your materials are free!
Logan Libraries also has free online video tutorials on many crafts, including sewing (see the links at the end of this tutorial). Online tutorials are a fun and low cost way to have fun with family and friends.
You already have all the materials to do this today! Let's get started.
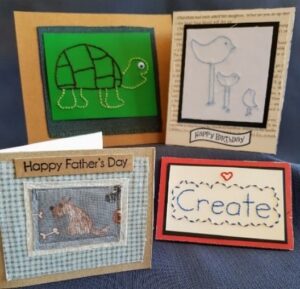
This tutorial will show you how to create:
- an 'inspiration sign' for your desk or fridge
- greeting cards for any occasion
- art to display or gift to a loved one
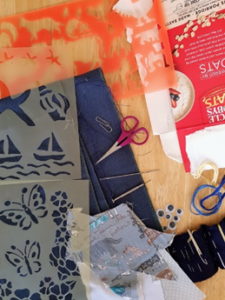
Materials:
- cardboard packaging, magazines, paper scraps, old greeting cards
- fabric scraps or old clothes
- scissors, glue or double-sided tape, needles, paperclip
- cotton/ribbon/wool from old clothes or project leftovers
- pencil, eraser, felt pen
- OPTIONAL: sewing machine, googly eyes, stencils
Make an Inspiration Sign for your fridge or desk
-
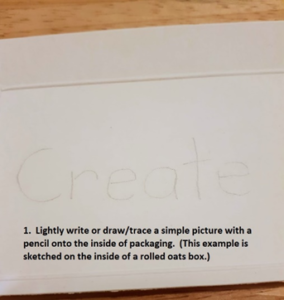
Step 1
Lightly write, draw or trace a simple picture with a pencil onto the inside of packaging. (This example is sketched on the inside of a rolled oats box)
-
Step 2
Use a thick needle, skewer or small screwdriver to punch holes along your sketched lines. Spacing works well at 3-5mm.

-
Step 3
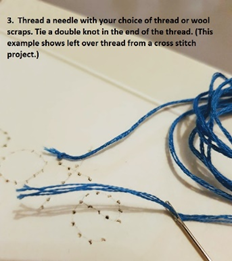
Thread a needle with your choice of thread or wool scraps. Tie a double knot in the end of the thread. (This example shows leftover thread from a cross stitch project)
-
Step 4
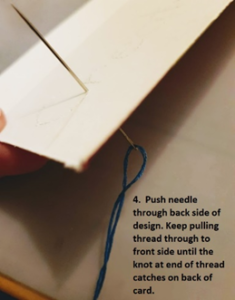
Push needle through the back side of design. Keep pulling thread through to front side until the knot at the end of thread catches on back of card.
-
Step 5
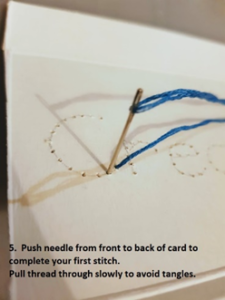
Push needle from front to back of card to complete your first stitch. Pull thread through slowly to avoid tangles.
-
Step 6
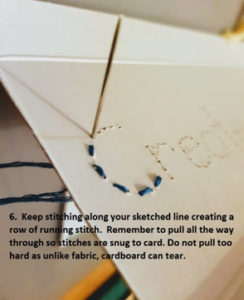
Keep stitching along your sketched line creating a row of running stitch. Remember to pull all the way through so stiches are snug to card. Do not pull too hard as unlike fabric, cardboard can tear.
-
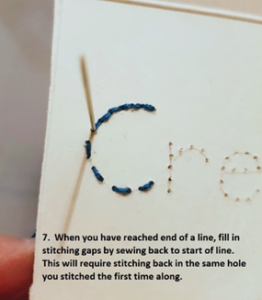
Step 7
When you have reached end of a line, fill in stitching gaps by sewing back to start of line. This will require stitching back in the same hole you stitched the first time along.
-
Step 8
Punch additional decorations or shapes as desired. This allows you to add more colour to your design.

-
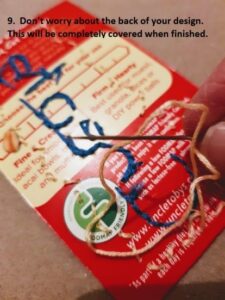
Step 9
Don't worry about the back of your design. This will be completely covered when finished.
-
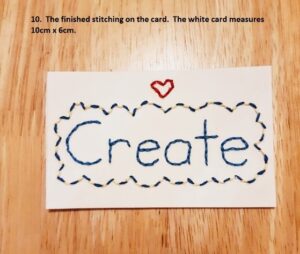
Step 10
The finished stitching on the card. The white card measures 10cm x 6cm.
-
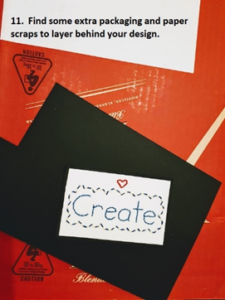
Step 11
Find some extra packaging and paper scraps to layer behind your design.
-
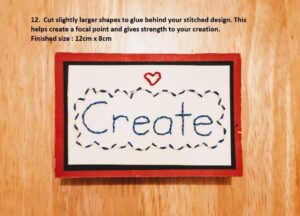
Step 12
Cut slightly larger shapes to glue behind your stitched design. This helps create a focal point and gives strength to your creation. Finished size: 12cm x 8cm.
Machine Stitched Father's Day Card
-
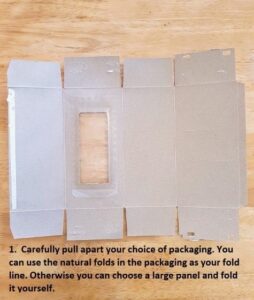
Step 1
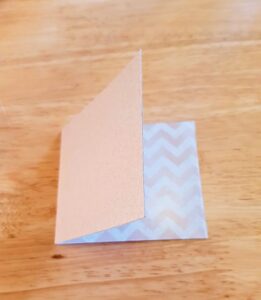
Carefully pull apart your choice of packaging. You can use the natural folds in the packaging as your fold line. Otherwise you can choose a large panel and fold it yourself.
-
Step 2
Cut box as required. This box could make a few projects.
This Father's Day card uses the circled piece.
The size of the cardboard was 21cm x 9cm. Therefore, the folded card measured 10.5cm x 9cm.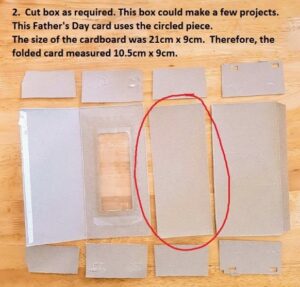
-
Step 3
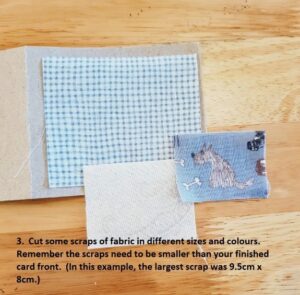
Cut some scraps of fabric in different sizes and colours. Remember the scraps need to be smaller than your finished card front. (In this example, the largest scrap was 9.5cm x 8cm)
-
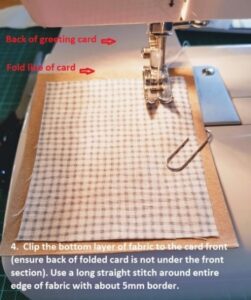
Step 4
Clip the bottom layer of fabric to the card front (ensure back to folded card is not under the front section). Use a long straight stitch around entire edge of fabric with about 5mm border.
-
Step 5
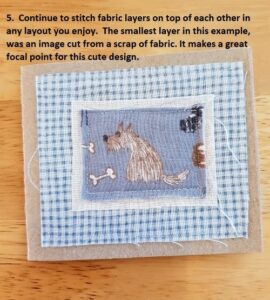
Continue to stitch fabric layers on top of each other in any layout you enjoy. The smallest layer in this example, was an image cut from a scrap of fabric. It makes a great focal point for this cute design.
-
Step 6
Depending on the design on the reverse of your packaging, you may wish to line the inside of your greeting card.
You can write a lovely message on the inside.
This is an old invoice. Use the blank side and cut to fit measurements of your card.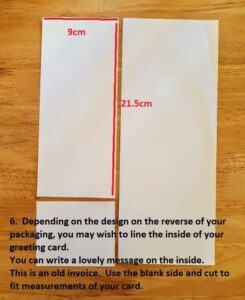
-
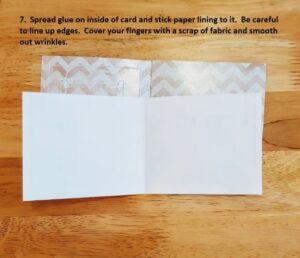
Step 7
Spread glue on inside of card and stick paper lining to it. Be careful to line up edges. Cover your fingers with a scrap of fabric and smooth out wrinkles.
-
Step 8
(Close up of the machine stitching)
Small frays in the fabric add to the rustic look of a handmade item.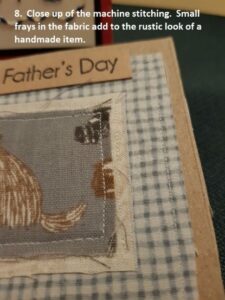
-
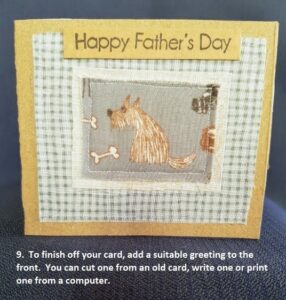
Step 9
To finish off your card, add a suitable greeting to the front. You can cut one from an old card, write one or print one from a computer.
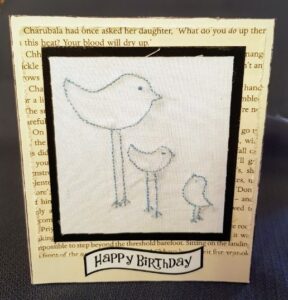
Hand Embroidered Happy Birthday Card
-
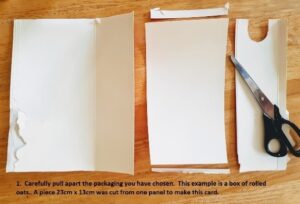
Step 1
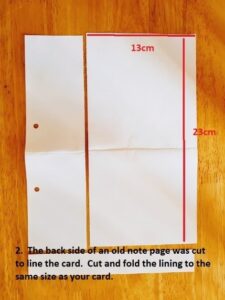
Carefully pull apart the packaging you have chosen. This example is a box of rolled oats. A piece of 23cm x 13cm was cut from one panel to make this card.
-
Step 2
The back side of an old note page was cut to line the card. Cut and fold the lining to the same size as your card.
-
Step 3
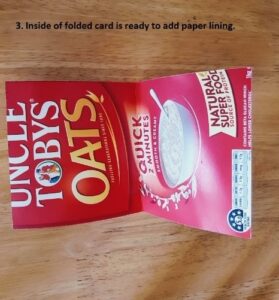
Inside of folded card is ready to add paper lining.
-
Step 4
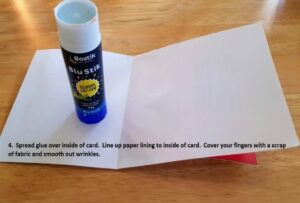
Spread glue over inside of card. Line up paper lining to inside of card. Cover your fingers with a scrap of fabric and smooth out wrinkles.
-
Step 5
Choose a piece of plain scrap fabric. Lightly draw/trace a simple picture or write a word onto fabric in pencil.
Hand stitch a running stitch over your lines (see 'Inspiration Sign' above for technique). Experiment with your stitch length and colour to enhance your design.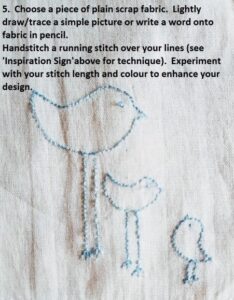
-
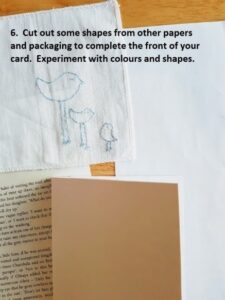
Step 6
Cut out some shapes from other papers and packaging to complete the front of your card. Experiment with colours and shapes.
-
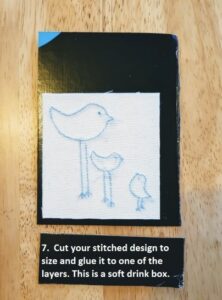
Step 7
Cut your stitched design to size and glue it to one of the layers. This is a soft drink box.
-
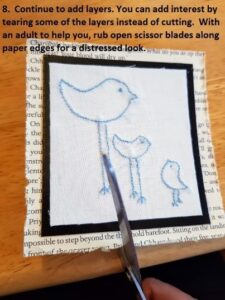
Step 8
Continue to add layers. You can add interest by tearing some of the layers inside of cutting. With an adult to help you, rub open scissor blades along paper edges for a distressed look.
-
Step 9
Rub a coloured felt pen along the edge of the card and/or layers.
This inked edge adds further flair to the handmade card. It does not have to be even or neat.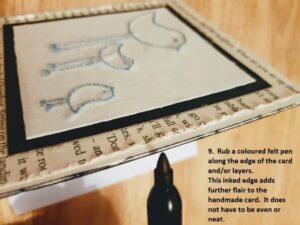
Stitched Art in a frame
-
Step 1
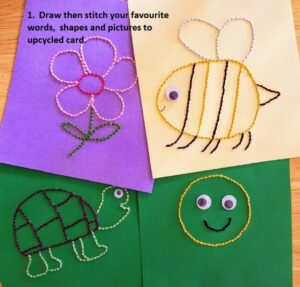
Draw then stitch your favourite words, shapes and pictures to upcycled card.
-
Step 2
Use fabric and other cardboard packaging and papers to create a photo frame for one of your designs.
Layer the items on top of each other one at a time. Then, cut out the next layer slightly wider than the next.
You could even measure it to fit an old photo frame you have at home.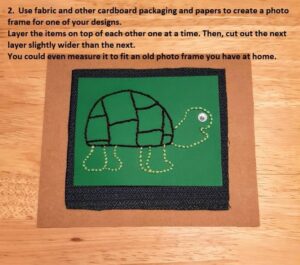
-
Step 3
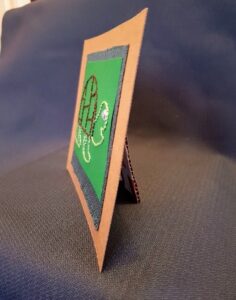
(Close up of stitching and layers of Turtle Art frame)
This example uses a left over piece of green card from a home-made sign, a scrap of navy fabric, packaging from a soft drink carton, leftover thread from a sewing project and a plastic toy eye. If you want more variety for your home supplies, try second hand shops!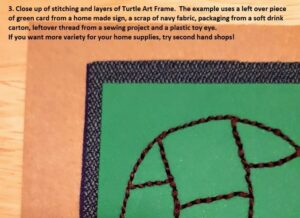
-
Step 4
If you don't have a photo frame to upcycle, you can make your own stand for a picture. A stronger piece of packaging from a large carton was used for the stand. This example art work measures 17cm x 1cm. The stand measures 15cm x 5cm
(15cm, fold line, photo stand, 5cm)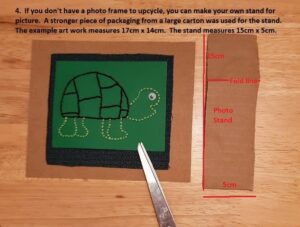
-
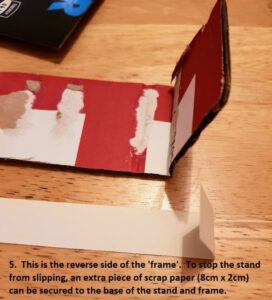
Step 5
This is the reverse side of the ‘frame’. To stop the stand from slipping, an extra piece of scrap paper (8cm x 2cm) can be secured to the base of the stand and frame.
-
Step 6
Fix the stand to the ‘frame’ as shown.
(5cm, 10cm, 2.5cm, 3cm, not seen in pic is another 2.5cm flap glued to stand)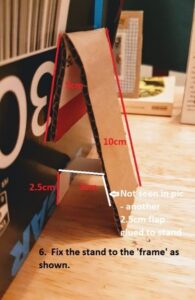
Have fun stitching! Stretch these ideas to create personalised, handmade items.
Keen to add more stitching and craft skills to your life?
Check out these items from the Logan Libraries catalogue. Library staff create book and resource lists across many genres and topics of interest.
https://logan.bibliocommons.com/list/share/388639247_loganlib_jennyi/1709074783_easy_stitched_gifts
https://logan.bibliocommons.com/list/share/388639247_loganlib_jennyi/1647029304_create_beautiful_craft_at_home_with_recycled_materials
On the Logan Libraries members can also access free online video classes and courses, such as,
Celebration Crafts
Learn to Sew
Find more Logan Library Craft Tutorials here:
How to make a Junk Journal
Upcycle an old shirt three ways
Create and publish your own Collage Web Comic
Create with old books and newspapers
Looking for items to upcycle with?
Logan Recycling Market