Create with Books and Newspapers!
How to Make Personalised Paper Decorations and Gift Bags
- Created by: Jenny I and the Logan Central Library Staff
- Age Range: Adults, Children with Adults Help
- Difficulty Level: Easy
- Time Taken: 1+ hour
- Approximate Cost: Free
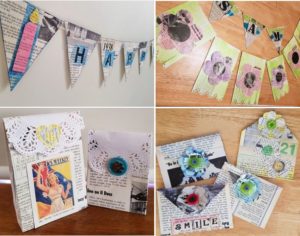
You can use old books and newspapers from around your home to make these cute, text-inspired paper decorations and gift bags. The bunting can be used to decorate a bedroom door, create a personalised banner for a celebration or to brighten up your home. The mini envelopes are the perfect size for a gift card. This is a great and unique way to present this popular gift. The gift bags can be made in any size to suit the gift you are giving.
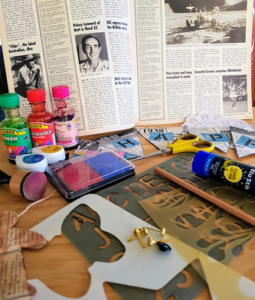
Materials
- Old books or newspapers Stapler, glue and ruler
- Coloured pencils, paints, inks or food colouring
- Fishing Line, string or ribbon
- Scissors/Fancy Edged Scissors Fabric or paper doilies
- Stencils, craft punches or hand drawn templates
- Old buttons, paper brads
Bunting
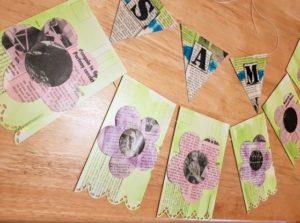
Triangles are the traditional shape for bunting and can be created for
- A child's name for their bedroom door or bed head
- A personalised birthday banner
- A charming sign for your next garage sale or market stall
Instructions
- Trace and cut the shapes. Rectangles are the easiest.
- Trace and cut the required amount of shapes for your wording or space.
Tip: If you want the sign to last longer, double the thickness of the paper or use a light cardboard backing (use tissue, cereal boxes, etc)
- Colour the shapes. Decorate each shape as desired with stencilled letters, ink and/or embellishments.
- Place the shapes in order and flip over so back of each shape is facing you.
- Staple or tape fishing line, ribbon or string to the back of shapes. Remember to leave a blank shape or spaces between words.
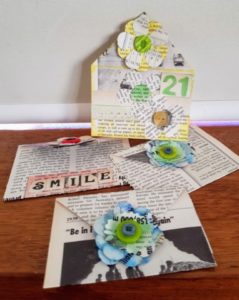
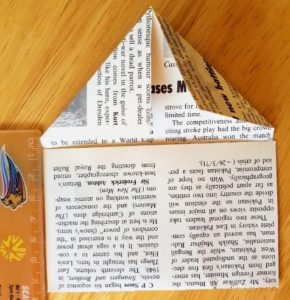
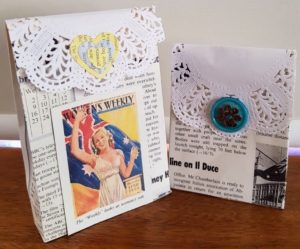
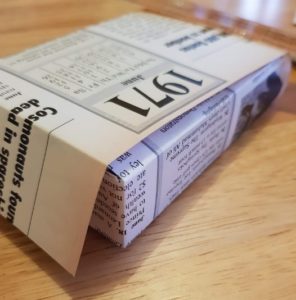
Gift Card Envelope
Instructions
- Cut a rectangle from book page or newspaper measuring 11cm (4½") x 20cm (8").
- Mark with pencil at 7cm (2¾") and 14cm (5½") on both long edges. Fold at these marks and unfold.
- Put a thin line of glue or double-sided tape on the edges of the bottom section. Close to form the 'pocket' of the envelope. Secure the sides of envelope.
- Leave a ½ cm gap between the envelope pocket and the folding edge for the triangle. Fold the flap of the envelope into a triangular shape and secure flaps with glue.
- Colour flap and edges of envelope (optional). Fold flap over.
- Decorate the flap of envelope and the face of envelope, if desired.
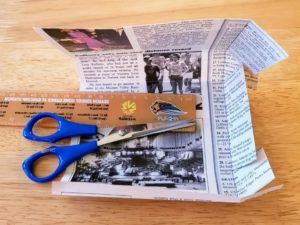
Gift Bag
Instructions
- Cut rectangle from book page or newspaper measuring 23 cm (9") x 16cm (6¼").
- Fold along the long edge at about 3 cm (1¼"). Open rectangle out flat again.
- With a pencil make a mark on the longest edge at 8cm, 11cm, 19cm and 22cm. Then cut up to the 3cm fold line.
- Re-fold each flap along the short edge at the 8, 11, 19 and 22 cm marks.
- Place glue on the smallest folded flaps and then fold and press onto longer folded flap to begin to form the bottom of the bag.
- Trim excess flap and trim any excess to keep sides flush.
- Place a line of glue on the long, narrow edge to seal side of gift bag. Place one hand inside the bag to assist lining it up.
- Using a contrasting coloured page or paper doily, cut an 8cm diameter circle or an 8cm square. Fold in half and glue half to back of top of bag opening. Seal the bottom of the bag with glue.
- Glue an embellishment to front flap.
These measurements make a gift bag 8cm x 12.5cm. Alter the starting measurements to make larger gift bags. Larger, undecorated bags make sustainable rubbish bin liners for bedrooms, bathrooms and offices.
Embellishments
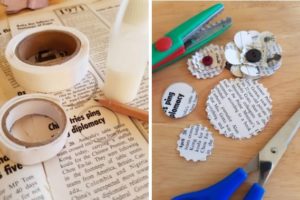
Flower
Cut out various sized circles or flower shapes. Layer shapes on top of each other and join with small dot of glue in centre. Add buttons or brads to centre of circles to make a flower.
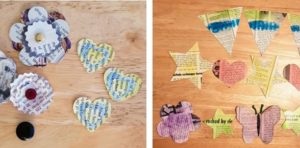
Other Embellishments
Punch out or trace shapes in various sizes. Colour with pencils, paint or food colouring. Layer and glue to other shapes to make your own decorations.
Looking for more?
RBDigital holds magazines for Cardmaking & Papercraft and PaperCraft Inspirations.
Universal Class has over 500 courses for Arts & Crafts.
Check out the craft books from Overdrive.