For the Holidays - Decorations from Nature
- Age Range: All ages
- Difficulty Level: Easy
- Approximate Cost: Free
Eco-friendly decorations create a pleasant and relaxed mood any time of year by bringing the natural world into our homes.
Over the holidays we can often enjoy a little more time with family. Why not spend that time together creating our own handmade keepsakes.
By decorating with natural elements, you can save money, have fun together and create an earthy feel inside and outside for the holidays.
Enjoy this tutorial with a few ideas on simple ways to decorate your home and stay connected to nature.
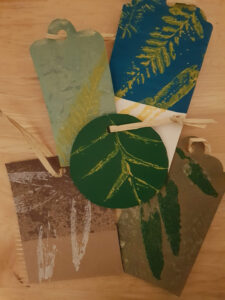
Monoprint Gift Tags
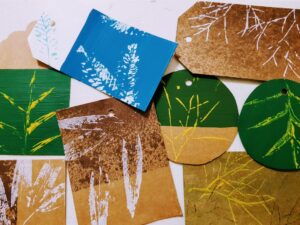
If you are giving to others over the holidays, you can make your own gift tags. Your gifts will sing with this extra personal touch.
Materials
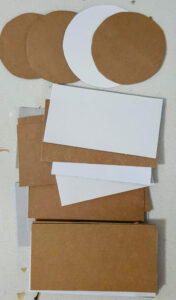
- Packaging from items you have bought (eg. tea box, cereal boxes, tissue boxes, paper shopping bags)
- Scissors
- Leaves, seed pods, sticks, flowers. Try to select leaves and flowers that have interesting shapes and textures.
Please collect and use plants under adult supervision to avoid young children eating items or having allergies.
A list of plants to avoid can be found at Queensland Health Poison Information for Plants and Mushrooms
- String, wool, cord, cotton, raffia, dried plant vines or grasses
- Paint, ink or food colouring
- Large leaf or old lid from a jar or container to mix your colour on
- Old rag or paper towel
- Optional: paintbrush, hole punch, sticky tape, small spray bottle
-
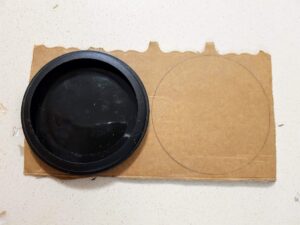
Step 1
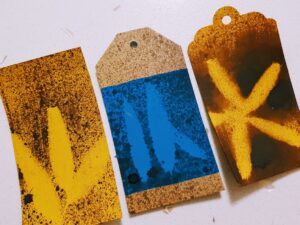
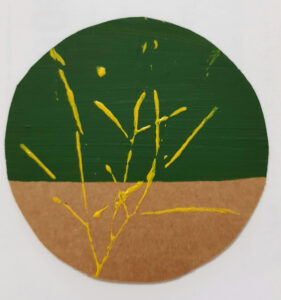
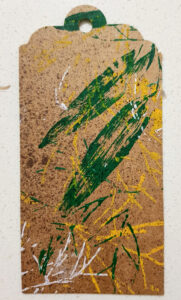
Cut your packing into at least 10 shaped tags. The easiest tag is a rectangle, however you can experiment with other shapes like circles (eg. use a cup to trace a circle). Your print will be created on the plain side of the cardboard.
-
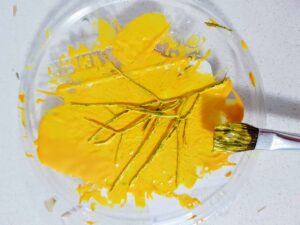
Step 2
On a large leaf or lid, use your finger or a stick to mix up your ink, paint or food colouring with a small amount of water. Aim for the consistency of very soft margarine and spread it out in a thin layer.
-
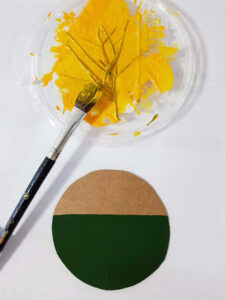
Step 3
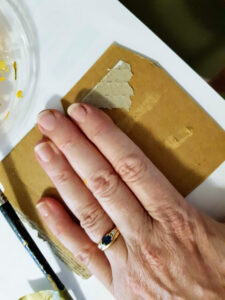
If you have a flat item, press it into the colour. If our item is bumpier, add the colour with your finger or a paintbrush.
-
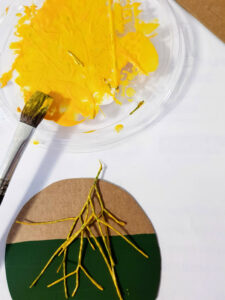
Step 4
Carefully peel your shape from the paint and press it onto the plain side of the gift tag. Cover it with a piece of scrap cardboard and apply light pressure.
-
Step 5
Wipe your hand on your rag or paper towel. With clean hands, gently peel the cardboard and your nature shape off of the tag to reveal your unique print.
-
Step 6
Leave the tag to dry thoroughly and near the top of the tag, add a hole with scissors or a hole punch.
-
Step 7
Thread a piece of string through the hole in your tag. Write the words “To: and From:” on the back of the tag.
-
Step 8
Continue making lots of tags and experimenting with layering different items and painting the backgrounds. Try mixing water and paint in a spray bottle to spray over items (this produces a silhouette effect).
Don't worry about making smudges or blobs. You can cover smudges with more layers or discard the tag and start again.
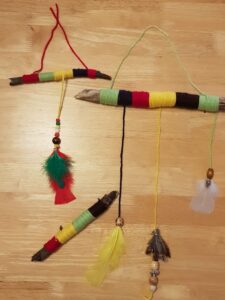
Yarning Stick
Only the person holding the "talking piece" can speak.
Two of the important elements for a yarning circle are to speak from the heart (in what is honest and true) and listen from the heart (pay attention without judgement of new ideas or feelings).
Source: https://www.schoolsreconciliationchallenge.org.au/activities/yarning-circle/
This is lovely project to make together as a family or as a gift for someone.
The yarning stick could also be used as a hanging decoration inside or outside.
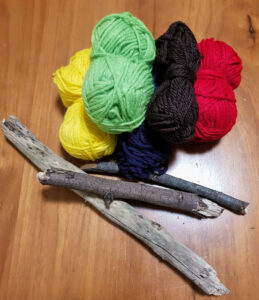
Materials
- Smooth stick approx. 25 – 50 cm long – take a walk around your garden or a Logan City Council Park to find one
- String, wool, cord, cotton, torn fabric strips, dried plant vines, husk fibres or grasses.
Please collect and use plants under adult supervision to avoid young children eating items or having allergies.
A list of plants to avoid can be found at Queensland Health Poison Information for Plants and Mushrooms
- Scissors
- Optional: beads, buttons, seeds and feathers
-
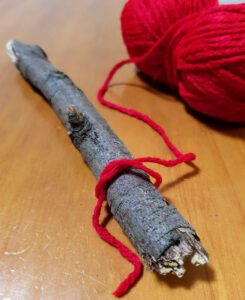
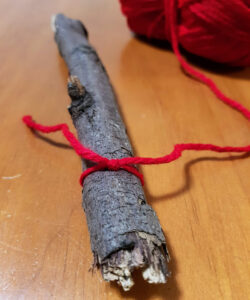
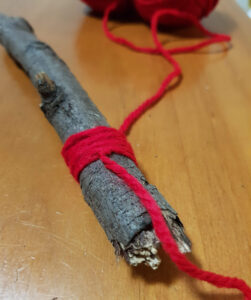
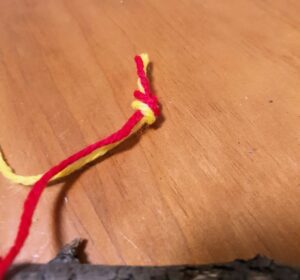
Step 1
Tie your yarn of choice to one end of the stick (about 5cm in from the edge). Use a double knot and make sure your yarn is nice and tight around the stick.
-
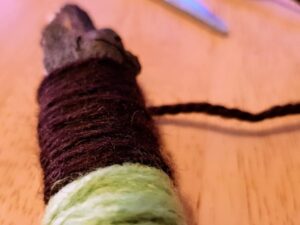
Step 2
Wrap the yarn tightly around the stick for a few centimetres, turning the stick as you go.
-
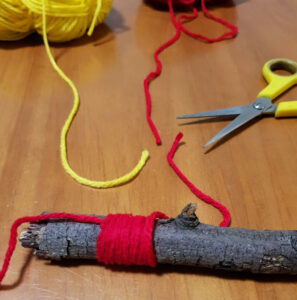
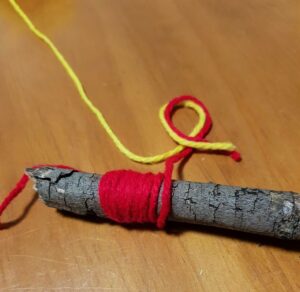
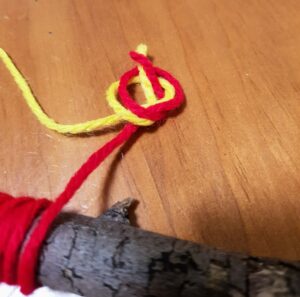
Step 3
Tie a new colour to the yarn on your stick. Wrap the yarn around the stick for another few centimetres, turning the stick as you go.
-
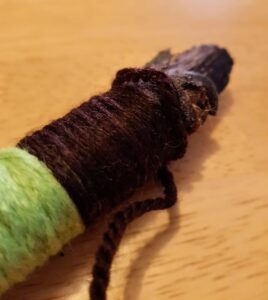
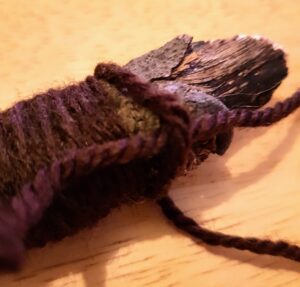
Step 4
Repeat step 3 until you almost reach the other end of your stick. Leave last wrap a little loose to allow room to slide yarn back under. Tie off with another double knot.
-
Step 5 (Optional)
Cut 2-3 extra pieces of yarn about 20 – 30cm long. Tie or thread objects (beads, feathers or other light weight seeds or small sticks) to one end. Tie the other end of the yarn around your new yarning stick.
-
Step 6
When you are finished you will have 3 pieces of yarn with objects hanging off of your talking stick. The final design and look of your talking stick is your choice. Add an extra piece to hang your decoration, if desired.
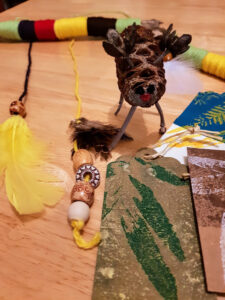
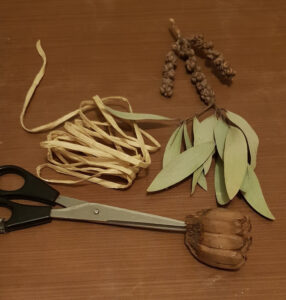
Seed and Cone Decorations
You can simply add a piece of string to a plant cone and you have a decoration!
Other ideas include:
- String several items together to create a long banner style decoration
- Construct an interesting creature
- Paint or cover with confetti
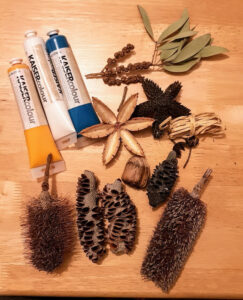
Materials
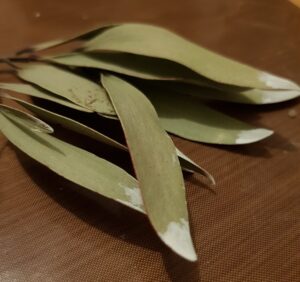
- Seed pods or cones eg. Eucalyptus nuts, Banksia flowers or cones, pine cones, Callistemon (bottlebrush) dried stems, leaves & seeds, Acacia (wattle) pods.
Please collect and use plants under adult supervision to avoid young children eating items or having allergies.
A list of plants to avoid can be found at Queensland Health Poison Information for Plants and Mushrooms
- Scissors, tacky glue or PVA glue
- Shredded paper or confetti (hole punch chads), permanent markers, glitter, cotton wool or paint
- String, wool, cord, cotton, raffia, dried plant vines or grasses
-
Start Your Imagination With These Ideas
When searching the environment for objects to use for your decorations, look for interesting shapes. Just like when we stare at the clouds and sometimes see shapes, do the same when out walking in nature.
-
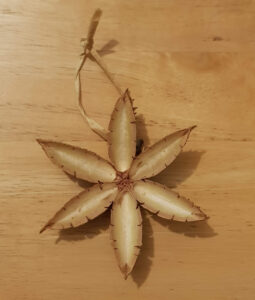
Start simple
This Crows Ash seed pod already looks like a star. Just add a piece of string!
-
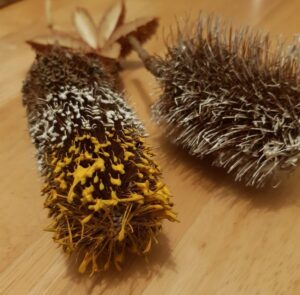
Natural home decoration
A pinecone or banksia flower is a great natural home decoration. Add paint, confetti or glitter.
-
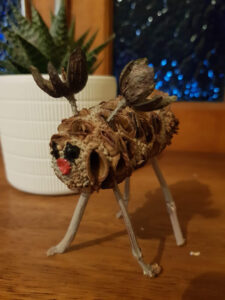
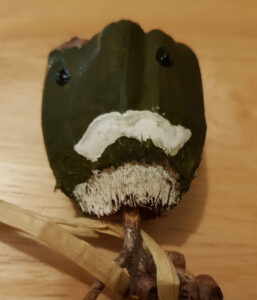
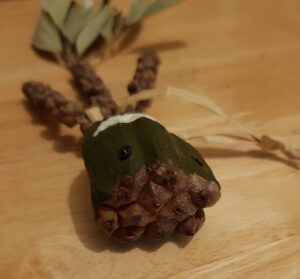
Creature
This branch with leaves and callistemon seeds looked like a creature with a "neck", a "body" and two "arms".
-
Another seed can become the "head". Push a small hole in one end of the "head".

-
If you desire, add more features with paint, a permanent marker, cotton wool or glitter.
-
Tie a small piece of string to hang your bush folk decoration.
-
Let your imagination go wild. Perhaps one of your creations can become a gift for someone special.Enjoy bringing the outside in!