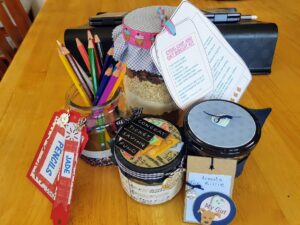
Beautiful Upcycled Jar Gifts
- Created by: By Jenny I and the Logan Central Library Staff
- Age Range: all ages (with adult supervision)
- Difficulty Level: Easy to Medium
- Approximate Cost: Free to Low
Do you have difficulty throwing out jars? They might come in handy one day, right? Well today is the day!
School holidays and Christmas are approaching! You can create beautiful, useful and economical gifts to share with your family and friends.
Use this fun tutorial as a guide and tweak it to suit the personality and interests of the receiver of your creations.
When choosing your decorations and embellishments, consider using papers, fabrics or other bits and pieces that you already have at home. This will give you even more upcycling street cred.
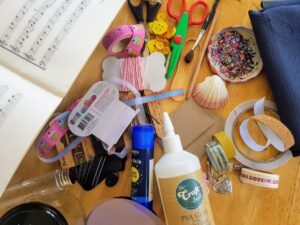
Materials
- Various sized jars: glass, ceramic or plastic jars (with or without lids)
- Decorations: gather and upcycle what you already have around the home, such as
- paper scraps
- cardboard packaging
- ribbon
- washi tape
- string
- rubber bands
- pom poms
- fabric scraps
- lace
- glitter
- shells
- magazine pictures
- wrapping paper
- tissue paper
- sheet music
- old maps
- Christmas cards
- Christmas paper
- foreign newspapers
- enamel paint
- pebbles
- Buttons, charms
- foreign money
- felt
- Pencil, scissors, small plate to trace around, white PVA/craft glue, (optional extras – hole punch, enamel paint, small paintbrush, permanent markers, double sided tape, masking tape, craft knife)
- Cotton wool, Nail polish remover or methylated spirits or eucalyptus oil
Instructions
-
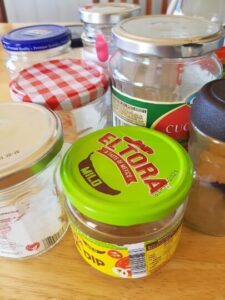
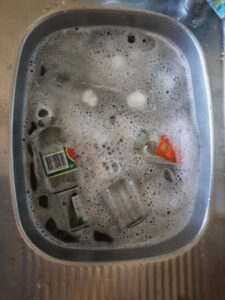
Step 1: Prepare the upcycled jars
Soak the jars and lids in very warm soapy water for about 30 minutes. This will soften the labels and glue.
With help from an adult, remove any leftover glue by rubbing with a cotton wool ball soaked in eucalyptus oil or methylated spirits or nail polish remover. Large patches of glue may need to be scraped off carefully with a butter knife.
Run through a hot dishwasher if you think the jar needs a bit more cleaning.
-
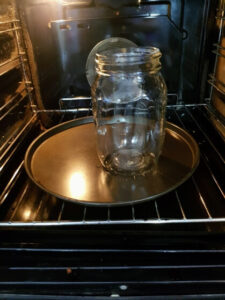
If you are using your jars for a food gift – sterilise the jars in an oven by placing them right way up on a baking tray (make sure jars are not touching each other). Bake in 180C oven for 10 minutes. Once cool, they will be sterile, so fill them quickly.
-
Step 2: Decorate the jar
Think about the purpose of your gift and the size of jars you have available.
Follow some of the ideas below or use your own imagination!
Decorate part, or all, of the jar. If you wish to paint directly onto the jar, you will need to use enamel based paints or specialised glass paints.
-
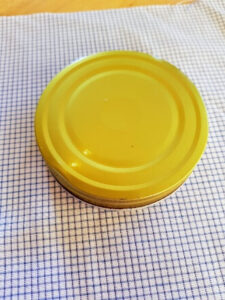
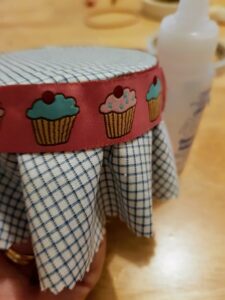
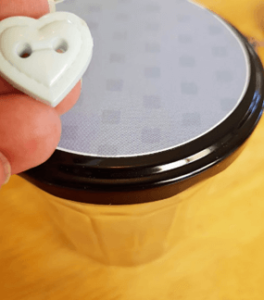
Step 3: Decorate the lid
If there is no lid, create a pretty cover for the bottle.
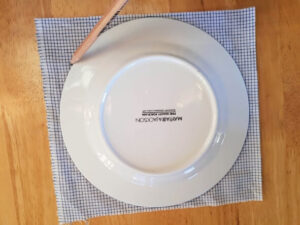
Draw a circle using a small plate as a guide on to some scrap fabric.
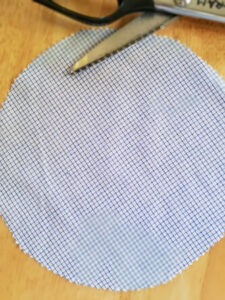
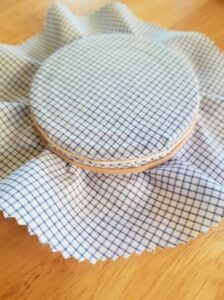
Cut out with scissors (or pinking shears make a zig zag edge) and secure the fabric circle onto the jar with a rubber band and/or string.
-
Step 4: Gifts will seem more luxurious with personalised labels
Upcycle a cardboard box from the pantry to create small, rectangular labels.
Use a hole punch to make a hole to thread string through.Write the person's name on it or describe what is in the jar.
If you don't like your handwriting, print the labels out onto recycled paper using a computer to assist with fonts. The paper can then be glued to cardboard.
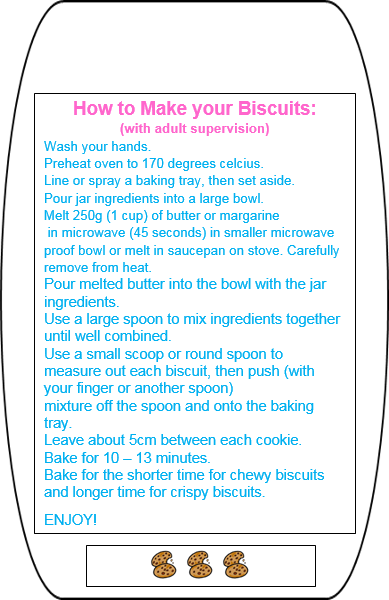
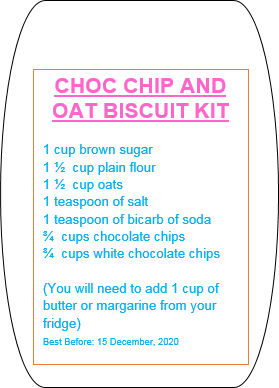
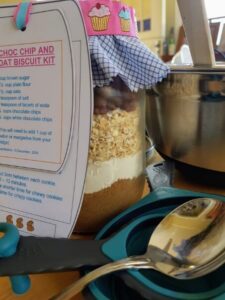
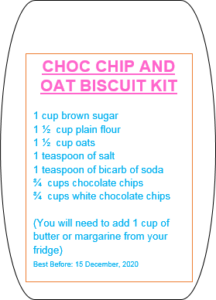
Choc Chip and Oat Biscuit Kit
-
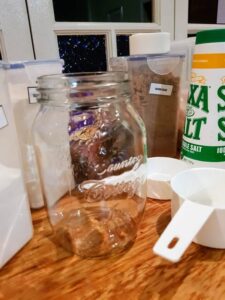
Step 1
Choose a jar (with a matching lid) large enough to hold 6 cups of ingredients (or adjust the recipe by half if your jar is smaller).
Sterilise the jar (as stated above) and decorate the lid while you wait.
-
Step 2
Cut a square of scrap fabric or upcycle a teatowel.
Trace around a small plate with a pencil.
Cut out the circle with scissors or pinking shears.
-
Step 3
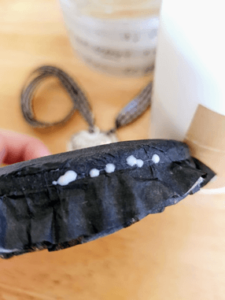
Using a 50/50 PVA glue/water mix, spread glue over the top and sides of the lid with a paintbrush or sponge.
Keep in place with a rubber band until the glue dries.
For an extra feature glue or tie a ribbon to the side of the lid.
-
Step 4
Gather the ingredients listed on the recipe card (at the end of this tutorial) or use your own favourite recipe.
-
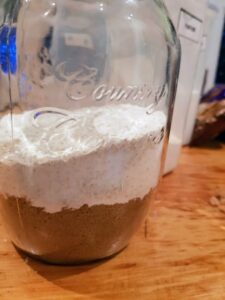
Step 5
Place the brown sugar into jar.
Tap lightly on counter top to reduce air and create a flat surface for next layer.
Continue layering flour, oats, salt, baking powder, chocolate chips tapping between each layer.
-
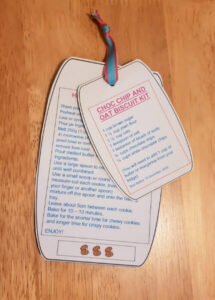
Step 6
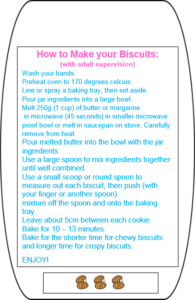
Hand write the ingredients (in case of allergies) and the recipe onto a small card (or print the ingredient and recipe card provided at the end of this tutorial).
Be sure to include a "Best Before" date as part of the ingredients. Attach the ingredient list and recipe to the lid or the bottle with sticky tape or tie on with string/ribbon.
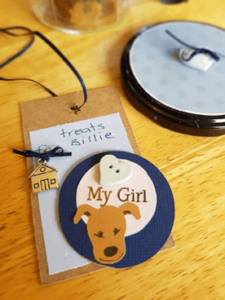
Pet Treat Jar
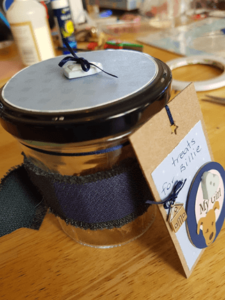
Fur babies need gifts too. I have designed this gift for my friend's dog, Billie.
-
Step 1
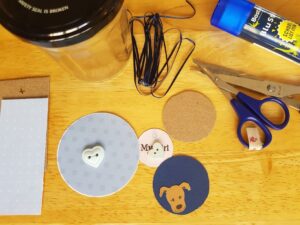
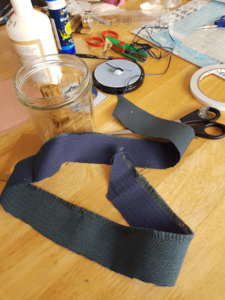
Gather a jar with a lid, ribbon, cardboard packaging, scraps of wrapping paper, buttons and fabric.
-
Step 2
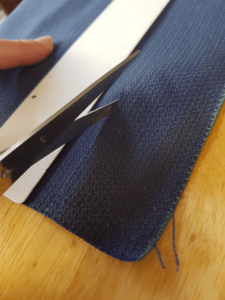
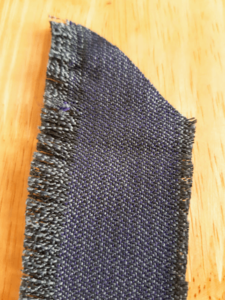
Cut a strip of fabric a few centimetres wide. Use a ruler as a guide.
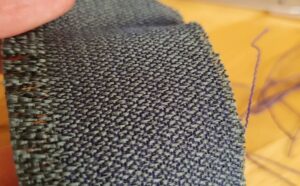
Fray the edges for a rugged effect.
-
Step 3
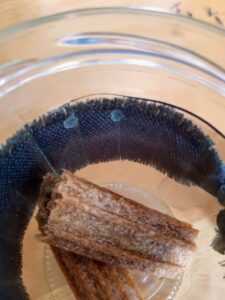
Tie the fabric to the jar and secure with a couple of dots of glue or glue dots.

-
Step 4
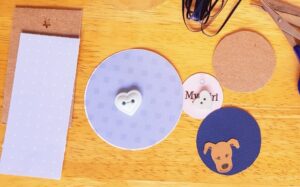
Cut out some circles and rectangles from cardboard packaging or scraps of wrapping paper.
Glue a coloured circle to the jar lid (trace around lid for a correct fit).
Glue a button to the lid.
-
Step 5
Layer the rectangle and circle shapes to make a personalised tag. Add a small photo or drawing of the pet and the pet's name.
Fill with their favourite treats.
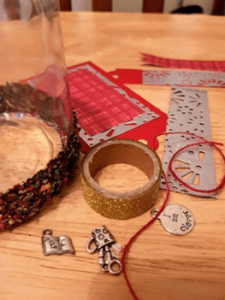
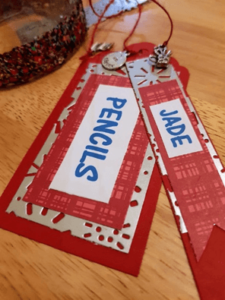
Pencil Jar
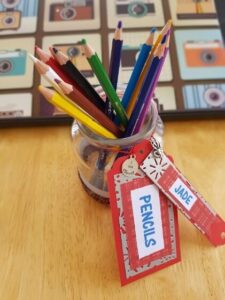
This jar could store pencils, pens, straws, breadsticks, cutlery or a toothbrush and toothpaste.
I have made a personalised pencil jar for a friend's daughter who is studying to be a teacher.
-
Step 1
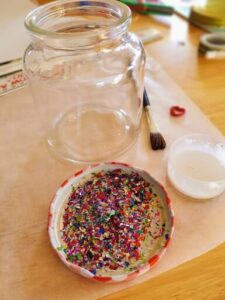
Place a piece of baking paper on your table.
Gather your bottle, glitter, your 50/50 water/PVA glue mix, a paint brush, a wet wipe and some masking/washi tape.
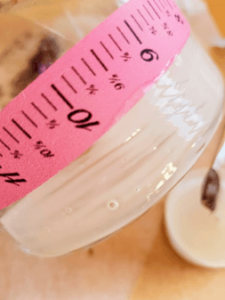
Wrap a line of masking/washi tape all the way around your bottle about 2cm from the bottom of the jar.
-
Step 2
Wrap a line of masking/washi tape all the way around your bottle about 2cm from the bottom of the jar.
Paint glue under the masking/washi tape all the way around the bottle. Wipe away any glue that goes under the bottom of the jar.
-
Step 3
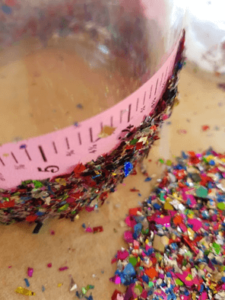
Pour out some glitter in a pile on the baking paper. Smaller sized glitter pieces are easier to work with than chunkier glitter pieces.
Roll the glued end of the bottle through the glitter until it is thoroughly covered. You can check for missed spots by looking inside the bottle while holding it up to a window or light.


-
Step 4
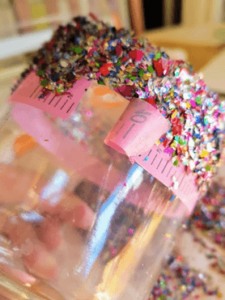
Wait about 10-15 minutes before slowly removing masking/washi tape. Carefully wipe any 'wobbly' parts with a wet wipe to create a straight line.
Leave to dry completely (overnight). Re-coat the glitter part with another layer of the PVA/water mix. Use a light tapping technique with the glue and paintbrush. Leave to dry overnight again.
-
Step 5
Gather some cardboard packaging, coloured paper, doilies, string and other embellishments (buttons, charms, etc).
Cut rectangular shapes of different sizes, layer and glue together.
Punch holes in the tags.
Write a personalised label and thread string through the holes.
Tie to your jar.To finish, fill the jar with goodies.
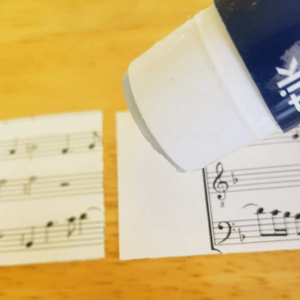
"Concert Ticket" Savings Jar
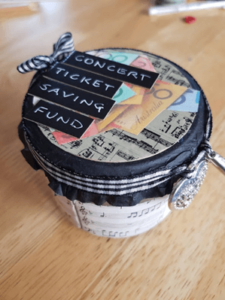
This makes a great gift for a young adult who likes to go to concerts and festivals.
You can make the savings jar and start them off with a monetary gift inside the jar.
You could even personalise the jar with their favourite artist's name on it or the name of the festival they want to attend.
-
Step 1
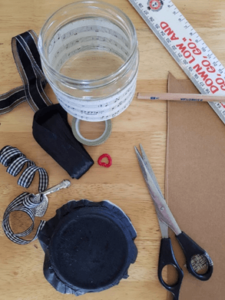
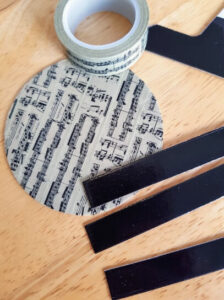
Gather a jar with a lid, ribbon, tissue paper or fabric, music or band themed paper (magazine or newspaper cuttings of their favourite artist) and strips of coloured cardboard.
-
Step 2
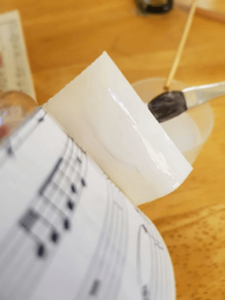
Measure the height of the jar and cut strips of paper to the height.
Most jars have a slight curve at the top and bottom.It is easier to stick the strip to the flat part of the jar only.

-
Step 3
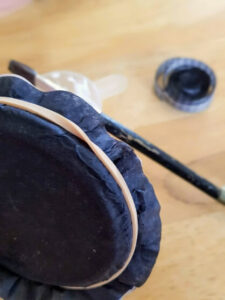
I have used layers of tissue paper to create the effect for this jar.
However, you could also use a circle of fabric (as in the Biscuit Kit Jar).
Secure with ruber bands until glue is dry.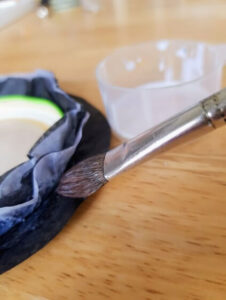
-
Step 4
Cut a cardboard or paper circle for the top of the jar (trace around the jar to get correct size.
I have decorated the circle with music themed washi tape. You could use the same paper as you used for the side strips too.Also cut some strips of card to write a label for the lid.
-
Step 5
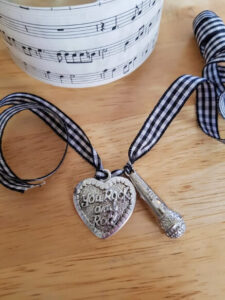
When the glue on the lid is dry, place glue or double sided tape around the edge of the lid.
I threaded some charms onto the ribbon and then carefully stuck the ribbon to the lid.
Write the Savings Jar Fund Name on the cardboard strips and glue them to the lid.
Other ideas for gifts in a jar
-
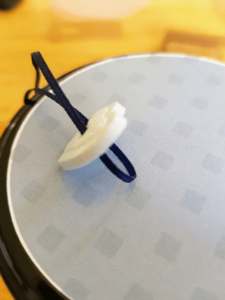
Wishing Jars
Great for weddings, 18th and 21st birthdays, graduation gifts or a wish list of restaurants to visit on pay day. Tap a hole in centre of jar lid with a nail. Add an upcycled knob that has a screw/washer fitted. Write little snippets of advice, jokes, sentiments or restaurants on small strips of paper. Tightly roll the paper strips around a pencil, hold for a few seconds. This will curl the paper slightly. Place the curled pieces of paper in the jar. Finish with a ribbon and tag around the jar lid.
-
Floating Candle/Flower Jars
Gather shells, marbles, pretty stones, floating candles or large single flowers. Fill jar to 1/3 with water. Add floating candles, flowers, pebbles or shells for a lovely table decoration.
-
Christmas Tealight Jar
Cut a picture from an old Christmas card or scrap of Christmas gift wrap. Mix PVA glue and water in a 50/50 mix. Glue your picture to jar, then seal the picture by carefully painting more glue over it. Add a battery operated tealight candle for a children’s gift or a real tealight candle for an adult gift.
Add a suitable warning about not leaving a lit candle unattended. Also, glass jar may become hot while candle is lit. -
Lolly Jar
Sterilise a jar (see above instructions). Fill a jar with your recipient's favourite lolly or treat. Add a decorated lid and a personalised label.
-
Terrarium Jar
Use a wide, short jar without a lid. Layer fine gravel, pebbles and soil. Use tongs or an old spoon to direct a small succulent plant and gently tap soil around it. Gently pour in a few mls of water. Add a personalised label and mini garden ornaments for fun.
Want to extend this craft activity?

Continue your education online and fulfil all your learning goals. Hundreds of real, high quality, online education courses in topics from exercise and fitness to web design and business.
Templates for Biscuit Kit Jar
-
Instructions Card
-
Ingredients Card